
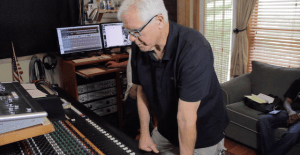
You would be hard pressed to name any notable Gospel records that did not have smacking live drums. Being the foundation of many songs, capturing, editing, and mixing the drums is extremely important and can often be a make or break element. In this three part series we will take a look at what it takes to make sure your drums sound and feel right on your next record and the many records that will follow.
 Hire The Right Drummer
First things first, you have to get the right drummer! So many artists have someone in mind to record drums; from friends to family, or even the drummer from their church. While these are great options to consider, especially usually because of cost, they are not necessarily the best options. When considering a drummer for your project, you should be thinking about these three things:
-
- Style – Are you looking for a pocket player, someone with a lot of flashy chops, or a happy medium.
-
- Consistency – When they play, do they confidently hit the drums? How often do they miss the drums and just hit the rims?
-
- Timing – Can they keep the tempo steady or when they do fills, do they land on the one?
Recording
Out of everything we record, acoustic/live drums are by far one of the hardest things to capture well. There are so many variables at play such as the room, the drums, and mic placement; to name a few. Three things to pay close attention to ensure your drums sound tight:
-
- Tuning – Before sticking mics on them, do the drums sound good by themselves in the room? Are the toms ringing out too long? Are there any rattles coming from anywhere? Since mics enhance and highlight what is already there, these things should be addressed before miking the kit.
-
-
-
-
-
- ★Bonus Tip: Fresh heads are optimal for drum recording, especially if you’re tracking multiple songs for the same album at once.
-
-
-
-
-
- Mic Placement – For Gospel, there are two main things we want to capture, the individual drums themselves and the cymbals. This is accomplished by employing both close mics and overhead mics. (If you have an awesome sounding room, room mics are nice, but not a necessity) Let’s talk about placement for each mic:
Bass Drum (often referred to as kick)

It’s easy to get carried away with multiple mics here, but one properly placed mic can yield excellent results. Preferably a mic such as the Shure Beta 52A or Audix D6 should be used here as they are specifically designed to pick up the low frequencies of the bass drum. If the bass drum has a hole in it, which is preferred, I like sticking the mic halfway in the hole As a starting point. Ultimately we want to listen to it during sound check to ensure we are getting the sound we desire.
Snare
Keeping it simple again, a mic such as the Shure SM57 or Audix i5 is fantastic. As you listen during sound check, pay close attention to ringing and hi-hat bleed. Both of these issues can be addressed by mic placement rather than jumping straight to EQ and other dynamic processors. Another trick for minimizing ring is dampening. There are many products designed specifically for this purpose but even if you don’t have any of these around, paper towels, tissue, and tape can go a long way.
Toms
 Toms
TomsIf you purchase mics specifically for drums, chances are they will come with clips to mount them on the drums. If you can afford it, do not use them; use stands instead. (The same goes for the snare) Remember we are trying to capture the drums, not the affect the drums have on themselves.
What affects are those you might ask. Unless your bass drum is a virgin (without tom mounting hole), every time you hit the bass drum the toms resonate and often times shake as well. This shaking usually brings along with it rattles from the mics being clipped on. One way to greatly reduce this is to take the toms off the bass drum and mount them on stands, but that could be more expensive than mic stands and if you are just an engineer/producer recording another drummer’s set in a session, is not a quick fix.
Check Out These Great Tom Mics!
Another note on tom mic placement is cymbals. Many drummers like to have their cymbals low for ergonomics, which isn’t friendly to recording. Not only does it make mics harder to place, it also creates the potential for bleed. Politely ask him or her if they do not mind raising up their cymbals. Along with this request, take time to explain why and make sure to throw in something like, “I’m just trying to make you sound sweet doc!”
Check Out Our Recording Gospel Course Taught by John “Yosh” Jaszcz
Overheads
When it comes to overhead mics there are generally two schools of thought; capture an overall view of the kit or capture the cymbals. Genre plays a factor into which process to take and ultimately knowing the desired sound for the finished record will be your guide. No matter which approach you take, it is extremely important to pay attention to phase. If you’re unfamiliar with the term, in regards to multi-miking, phase is simply the result of the time it takes intended source to reach the microphones. You already know sound waves travel through air and arrive at the mics. When something is in phase, the microphones are picking it up at the same time, which results in a full and punchy sound. When out of phase (being picked up at different times) certain frequencies will be masked or in the case of a completely out of phase signal, the sound completely disappears.

To minimize this you have to take caution to place the overheads equal distance from either the bass drum, the snare, or the drum throne. A lot of engineers have differing opinions on which is best, I personally go from the snare since it is the loudest part of the drum set and is hit the most frequent. A great tool for nailing this placement is a tape measure, but a cool trick if one is not available is a mic or instrument cable. Simply hold the cable out from your desired “center point” and use your thumbs to “mark off” the length. (This process is certainly easy and faster with a second set of hands, but even if you are recording yourself, it is not difficult)
Now that all the mics are placed we need to go through a complete sound check, one mic at a time. During this time you are listening for any issues with placement, rattles or squeaks previously undetectable, and dampening requirements (if any). If your microphone preamps have polarity or phase switches, you can use these to check phase. Sometimes soloing two mics at a time is a great way to check this. If you hit the button and all of a sudden the sound gets much fuller and refined, the placement was a little off, but no worries that is what the button is for; leave it engaged!
Levels
 The last thing to look at prior to pressing record is making sure we have good levels. This is again an area where there are differing opinions
, but one universally agreed upon thing is DON’T CLIP! Out of all the great tools we have at our disposal to save “unusable” audio, completely restoring clipped (distorted) files is not one of them. Depending on your DAW, the optimal recording levels will vary, but metering is generally very similar. That being said, I like to keep my levels in the green, going into yellow at times especially on really dynamic records.
If you have trouble keeping your levels down even with little to no gain applied on your preamps you should invest in Inline Attenuation Pads such as this (https://amzn.to/3j5guUP). These pads come in various dB specs ranging from -10dB to -40dB. Connecting these to your cables before hitting the preamps will reduce the incoming signal allowing you to dial in the perfect gain settings. (Some mic pres already have pads built in)
Take Away
If you get nothing else out of this, the main thing to do is listen. Everything we do as producers/engineers revolves around sound and that should always be the thing we resort to above all else. Once you’ve got a great drummer, well tuned drums, good mic placement, and good levels, take a step back and just listen. If something, such as annoying snare ring is bothering you, address it right away. Do not say “I’ll fix it in the mix”, get it right in the moment because you want to be able to playback the recording and everyone in the room is in awe of how amazing the drums sound. Even if someone is paying you by the hour, the extra time spent getting the sound just right will be well worth it and they WILL come back!
Happy record making and I’ll catch you in part two where we will move onto drum editing.
 About The Author:
Starting on drums and migrating to piano and saxophone then continuing on to engineering, DeLaVanta has been in the music industry his entire life. He has produced, recorded, edited, and mixed music in many genres specializing in music with live instrumentation. In addition to music, he has worked extensively in the world of Post Production as a Re-recording Mixer for Films, TV Shows, and Documentaries. Most recently working at Tyler Perry Studios as a re-recording mixer on the hit shows The Oval and Sistas. You can see Del’s full body of work and or contact him on his website: https://www.hydrateent.com/


